React Native 新手常见问题及体验总结
之前有使用 React Native 的开发经历,记录下了开发过程的常见的错误和解决方案,也算是从头趟了一遍 RN
开发过程的坑,本篇主要包括日常踩得一些坑以及我使用 React Native 开发体验总结。
State update on an unmounted component
Can’t perform a React state update on an unmounted component. This is a no- op, but it indicates a memory leak in your application. To fix, cancel all subscriptions and asynchronous tasks in the componentWillUnmount method.
这是一个常见的错误,当我们初始化首页screen屏幕时会使用 fetch 做一些异步请求,请求成功后在回调方法里使用 setState
更新组件数据,但如果在请求 pending 状态下跳转到其它屏,组件已经销毁,这时再去 setState 会报 Warning
⚠️,这个问题的解决思路有两个:
- 组件销毁时取消发出的 fetch 请求。
- 增加组件是否销毁判断字段,在 componentWillUnmount 方法里设置组件已销毁。
如何中断一个 fetch 请求?可以尝试使用 AbortControllerAPI,
AbortController 接口是一个控制器对象,在fetch 请求中增加
signal参数,允许你在需要时中止一个或多个请求,例如:
class HomeScreen extends Component {
  abortController = new AbortController();
  constructor(props) {
    super(props);

    this.state = {
      data: [],
    };
  }

  componentDidMount() {

    fetch('https://my.api.com/api?query=reactnative', { signal: this.abortController.signal })
      .then(result => {
        this.setState({
          data: result.data,
        });
      });
  }

  componentWillUnmount() {
    this.abortController.abort()
  }

  render() {
    ...
  }
}
我使用另一个更简单的方法,在调用 setState 方法更新数据前使用 _isMounted 字段来判断组件是否已经被销毁:
class HomeScreen extends Component {
  _isMounted = false;

  constructor(props) {
    super(props);

    this.state = {
      data: [],
    };
  }

  componentDidMount() {
    this._isMounted = true;

    fetch('https://my.api.com/api?query=reactnative')
      .then(result => {
        if (this._isMounted) {
          this.setState({
            data: result.data,
          });
        }
      });
  }

  componentWillUnmount() {
    this._isMounted = false;
  }

  render() {
    ...
  }
}
60版本添加 react navigation
React Native 升级到 0.60 后,支持 AndroidX 和 Autolinked 自动连接 package
包算是两个比较大的更新,具体可以查看更新blog:
AndroidX is a major step forward in the Android ecosystem, and the old support library artifacts are being deprecated. For 0.60, React Native has been migrated over to AndroidX. This is a breaking change, and your native code and dependencies will need to be migrated as well.
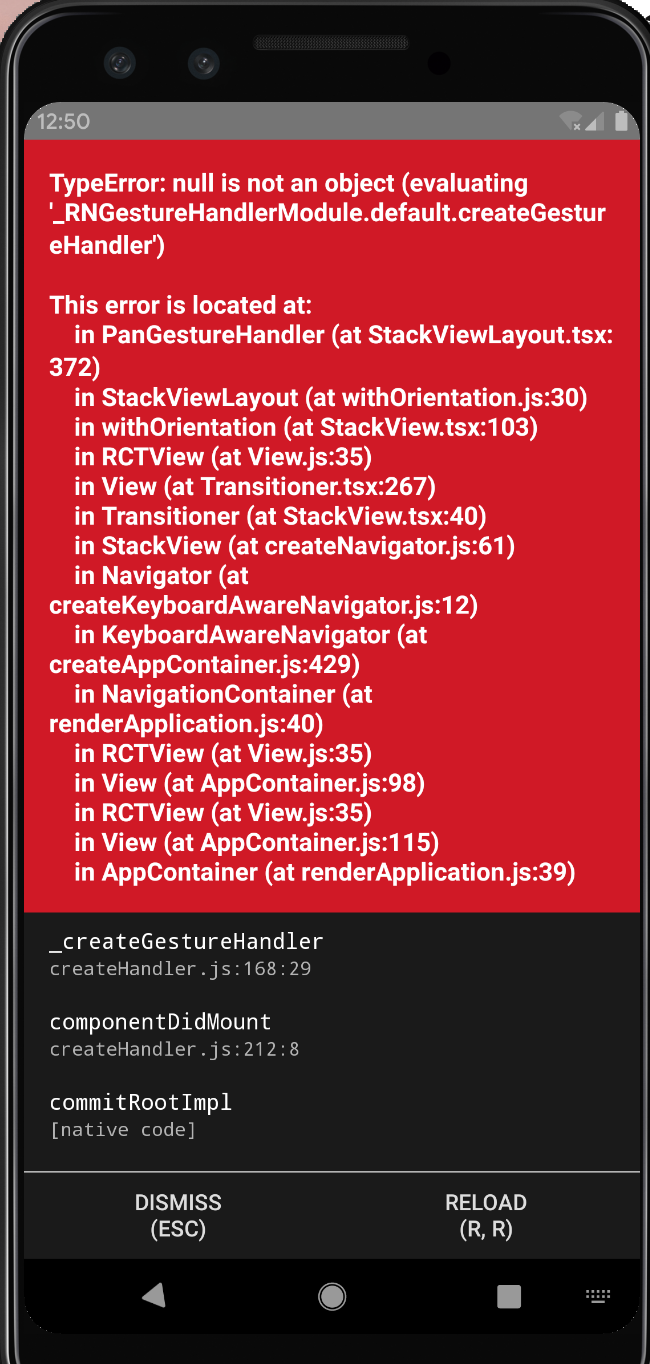
但是坑出在有些文档没有及时更新,包括第三方库没有及时更新,导致我在使用 react navigation 、react-native-gesture-
handler 第三方库时遇到的一连串的bug。包括 react-native-gesture-handler 使用了android
support 的一些库,没有及时更新到
AndroidX,因为AndroidX
是谷歌支持库的替代品,目前 Android P处于过渡阶段,下一个版本的Android可能只支持AndroidX。
xxxx/nodemodules/react-native-gesture- handler/android/src/main/java/com/swmansion/gesturehandler/react/RNGestureHandlerEvent.java:3: error: package android.support.v4.util doesn’t exist import android.support.v4.util.Pools; ^ xxxx/android/src/main/java/com/swmansion/gesturehandler/react/RNGestureHandlerEvent.java:19: error: package Pools doesn’t exist private static final Pools.SynchronizedPool EVENTSPOOL = ^ error: package android.support.v4.util doesn’t exist import android.support.v4.util.Pools;
解决方法:
无法自动 link 的包可以手动链接依赖,例如在 iOS 平台手动 link react-native-gesture-handler、react-
native-svg等包,建议先执行unlink命令,添加 react-native.config.js 文件:
module.exports = {
  dependencies: {
    'react-native-gesture-handler': {
      platforms: {
        ios: null
      }
    },
    'react-native-svg'
      platforms: {
        ios: null
      }
    }
  }
};
使用jetify处理 AndroidX导致的问题:
在package.json里添加 jetify相关配置:
"postinstall": "npx jetify"
使用react navigation 开发路由导航过程中遇到的几个 bug 可以查看提的这几个 issues:

- react-navigation/issues/6066
- react-native-gesture-handler/issues/649
- react-native-gesture-handler/issues/494
Flex in React Native
React Native 中同样也可以使用 flexbox 布局,和 web 上基本一致,如果不了解 flex 布局的可以查看之前总结的这篇
Flexbox布局完全指南,但也一些需要注意的地方:
- flex 的排列方向默认是竖直排列即
flexDirection:column。 - flex 只能指定一个数字值,它有三种状态:正数、零与负数。
- alignItems在
React Native中默认是alignItems: stretch。 - 部分属性在RN中不支持:
align-content,flex-basis,order,flex-basis,flex-flow,flex-grow,flex-shrink。
具体用法这里不再介绍,官方文档上有很详细的描述Layout with Flexbox
DeviceException 未连接设备
error Failed to install the app. Make sure you have an Android emulator running or a device connected. Run CLI with –verbose flag for more details.
Error: Command failed: ./gradlew app:installDebug -PreactNativeDevServerPort=8081
FAILURE: Build failed with an exception.
What went wrong:
Execution failed for task ‘:app:installDebug’.
com.android.builder.testing.api.DeviceException: No connected devices!
这个报错是安卓的 Virtual Devices 没有开启,可以使用 adb devices 命令查看当前设备,确保运行 react-native
run-android 命令时开启调试设备,安卓平台可以在 Android Studio - Tools -AVD Manager 中打开。

YellowBox ignore Warnings
使用 YellowBox 忽视一些警告 ⚠️,但不推荐这样做,毕竟一些警告还是比较有用的信息。例如:
Warning: componentWillMount is deprecated and will be removed in the next major version. Use componentDidMount instead. As a temporary workaround, you can rename to UNSAFE_componentWillMount.
Please update the following components: EventScreen
Learn more about this warning here:
https://fb.me/react-async-component-lifecycle-hooks
在开发环境可以使用 YellowBox 忽略这些警告:
import { YellowBox } from 'react-native';
YellowBox.ignoreWarnings(['Warning: ...']);
RedBoxes and YellowBoxes are automatically disabled in release (production) builds.
不过在发布或线上打包的版本中,YellowBoxes 的提示会被自动禁掉。
引用第三方库 build失败
例如使用 react-native-wechat
集成微信的好友、朋友圈分享功能时,Android 环境 dev 本地开发环境一切正常运行,使用命令进行 apk 打包时提示 gradle
build 失败:
error: failed linking references.
FAILURE: Build failed with an exception.
What went wrong:
Execution failed for task ‘:RCTWeChat:verifyReleaseResources’.
com.android.ide.common.process.ProcessException: Failed to execute aapt
Try:
Run with –stacktrace option to get the stack trace. Run with –info or –debug option to get more log output. Run with –scan to get full insights.
Get more help at https://help.gradle.org
这类问题很多情况是第三方包 gradle 版本配置与主体项目下的配置不一致导致的,例如项目使用的
28.0.3,而第三方包使用的是更低的版本,建议将引用库 gradle
配置更新成与RN项目android文件下build.gradle文件配置一致:
buildscript {
    ext {
        buildToolsVersion = "28.0.3"
        minSdkVersion = 16
        compileSdkVersion = 28
        targetSdkVersion = 28
        supportLibVersion = "28.0.0"
    }
    repositories {
        google()
        jcenter()
    }
    dependencies {

        classpath("com.android.tools.build:gradle:3.4.1")

        // NOTE: Do not place your application dependencies here; they belong
        // in the individual module build.gradle files
    }
}
如何进行 React Native 开发调试
模拟器开启Developer Menu:
iOS模拟器可以通过 Command⌘ + D 快捷键来快速打开Developer Menu,Android模拟器可以通过 Command⌘
+ M快捷键来快速打开 Developer Menu。

如果想查看组件的层级关系,可以全局安装 react-devtools
$ npm install -g react-devtools
$ react-devtools
运行后 React Native 应用会自动连接,会出现 connectting 窗口,刷新 App 即可看到当前 screen
的组件层级情况:


如果想看控制台输出log日志,可以输入以下命令:
$ react-native log-ios
$ react-native log-android

万能的清除缓存和重启
经常碰到一些莫名其妙的错误,发现以下命令删除本地包,重装依赖重启总是很管用:
watchman watch-del-all // 清除Watchman:
rm -rf node_modules && yarn install // 删除node_modules并重装
react-native start --reset-cache // 清除rn缓存重启
react-native run-ios 或 react-native run-android
总结
As a result, moving forward, we are sunsetting React Native at Airbnb and reinvesting all of our efforts back into native.
先后有 Airbnb 和 Udacity 表示将弃坑 React Native,回归到原生开发上。具体可查看公司技术博客:
1. Sunsetting React Native
2. React Native: A retrospective from the mobile-engineering team at
Udacity
我简要谈谈自己的体验和看法:
“文档应当鲜活并保持更新”
当然这句话不是我说的,是 Eric Evans
在《领域驱动设计》中的一句话,我引用它是想表达:如果代码能实现或体现最好,文档应该是起辅助作用的,而不是累赘;文档没及时跟上代码的更新将会给开发者带来很多麻烦。React
Native 的文档已经被很多人吐槽过,RN社区曾经有个issue What do you dislike about React
Native?用来收集开发者在使用RN时的痛点,排在前三的就是:升级调试加崩溃。一旦需要从 RN
的旧版本升级到一个新的大版本时就变得很异常困难。
第三方组件、库的支持
虽然目前 React Native 社区已经发展得足够大,社区的开发者发布了很多组件、库等方便大家开发时引用,实现各种复杂的需求,提供对业务的支持。但问题出在很多库没有及时跟上RN的大版本发布及相关改动,或者说有些库的已经不再更新维护,在没有时间自己开发或寻找替代品的时候,这也是很棘手的一个问题。
开发速度快但有一定的上手难度
作为混合的跨平台解决方案,React Native 具有比较高的可行性, 相对于大公司移动端会有比较大的团队来开发维护原生
App,RN比较适用于(2/3个开发人员)小团队成员,或者说没有足够的人员分别去开发原生应用的团队,小团队并且直接使用 JavaScript
生态系统的库、工具就能开发应用,一套代码两端适用,开发速度上有大幅度提升,也节约了人力成本的开支。有经验的Javascript 和 Web
开发人员能很快得入手,但是对于新手,尤其是对React及相关概念不了解的同学,会有一定的上手难度。
没有使用其它混合方案框架例如 Fluter、Weex 等进行开发混合应用,这里无法进行对比,只是总结最近一段时间使用 React Native
的开发体验,从初始化项目到应用上架整个过程并不是很流畅,真机调试过程经常有应用崩溃的情况发生,代码排查错误或者找问题的过程花费了我比较多的时间,另一方面是使用第三方组件、库等是一个踩坑过程,文档等没有及时更新,在添加配置的过程出现很多问题,可能是我刚好碰上
60 这个大版本,总的来说我认为 React Native
应该还是目前比较好并且稳定的混合应用开发方案,但在开发者使用体验上社区和团队需要进一步优化改善。
附录
参考学习的一些资料:
1、Announcing React Native 0.60
2、React Native at Airbnb
Tips: Until now, everytime you want to store your article, we will help you store it in Filecoin network. In the future, you can store it in Filecoin network using your own filecoin.
Support author:
Author's Filecoin address:
Or you can use Likecoin to support author: